
Hi, this is Shubham from mygadgetshub, hope you are doing well and taking care of your PC. If not, then you must take care of your PC so that your productivity doesn’t get affected. But many times we see that our PC becomes very slow because of many reasons – some of the reasons are old hardware, an old technology storage system(HDD) and sometimes because of computer viruses.
So in that case, what to do? It’s better to format your PC to improve its performance. Don’t worry, all your data will not get erased. There are many ways to format your PC. But in this article, we will learn how to format your PC using a pen drive.
Read also:
How to format pendrive without duplicating the files
— mygadgetshub.com
Maybe you all are familiar with the traditional PC formatting methods, but formatting a PC using a pen drive is something unique. So let’s see how to format a PC using Pendrive.
Formatting a PC or laptop using a pen drive and installing Windows on it is a faster and more practical task than other methods.
Some laptops don’t come with DVD players so in such types of laptops, notebooks and Ultrabooks pen drive is the only option to install Windows.
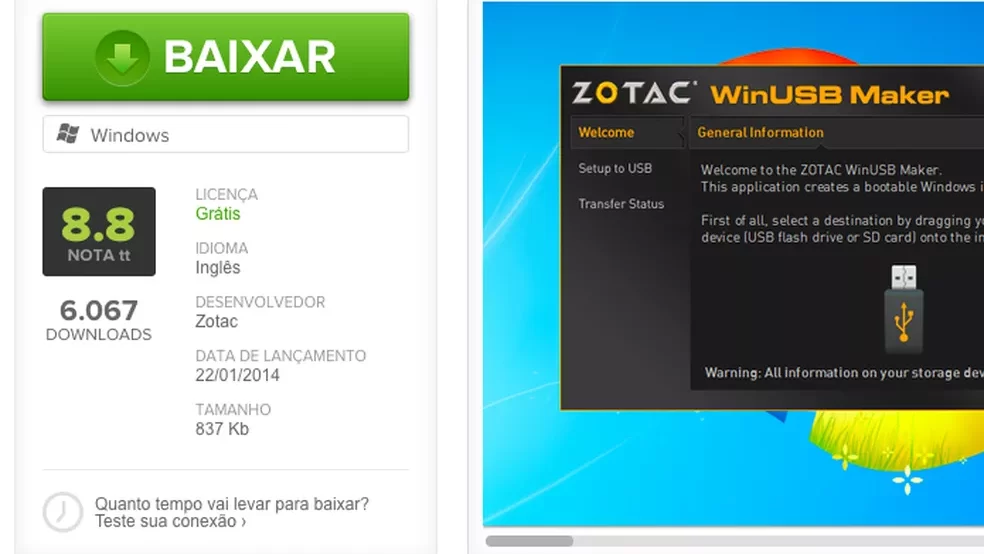
So let’s get started, on how to format a pen drive using a WinUSB Maker program. This is a particular software developed by Microsoft that allows you to transfer Windows to any removable device. You don’t need optical discs(CD/ DVD) to install Windows on a computer.
Step by step guide on how to format PC using Pendrive
Follow the steps below to format your PC using a pen drive.
Step 1
Firstly, download Zotac WinUSB Maker software from the official website of Microsoft. This application software is small, so it will not consume a lot of your PC space and RAM to run.
Step 2
Now double-click on the software and run it.
Step 3
Connect your USB pendrive to your computer. On the first screen of the software, indicate which device you are going to use. Now open “My Computer” and drag the pen drive icon to the Zotac WinUSB Maker window.

Step 4
Now repeat the above step for the ISO file for Windows formatting – drag it to the application window and click on the “Make USB Bootable” option. (Windows Vista and higher versions of Windows are supported for this action). Make sure the size of the pen drive is larger than the recorded file.

Step 5
An important warning for you always keeps the backup of the files that are stored on your USB pen drive. I recommend you use a completely blank pen drive. To proceed, click on the “Yes” option and wait for the process to get completed.
Step 6
To start the PC using a Pen Drive, it’s very important to configure the BIOS. On most PCs, you have to press the “Delete” button when turning on the computer and on some PC the key is the “F2” function key.
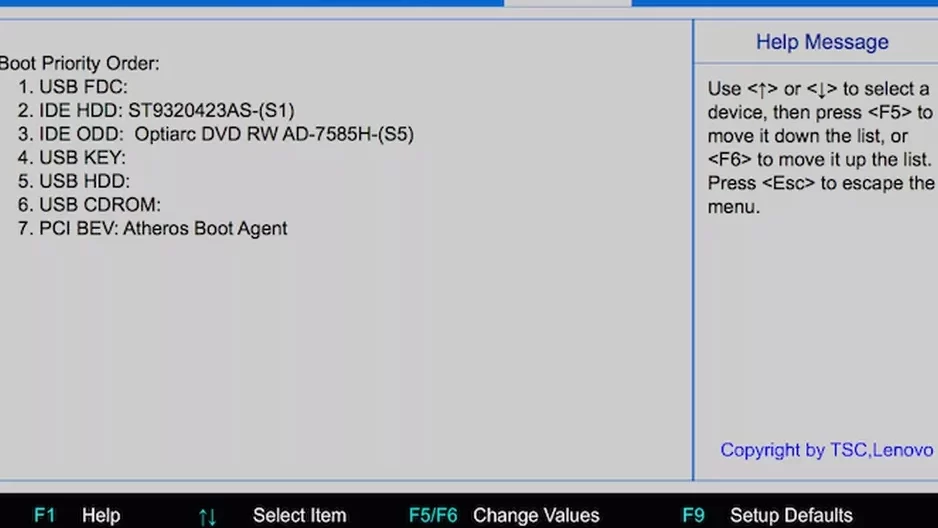
In the BIOS, locate the boot option and set “USB” as the first option.
Now your PC is ready. In this way, when you will restart your computer with the pen drive connected with it, the Windows installation process will start and you will be able to proceed with the formatting or installation of the system as usual.
Conclusion
So this was a complete step-by-step guide on how to format a PC using Pendrive. Hope you love this guide article. Do share it with your tech enthusiast friends and family who own a computer, maybe someday they need to format their PC so that they can easily format their PC by reading this guide.